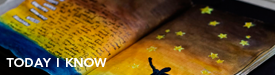
Since yesterday was Easter, we decided it would be fun to paint some eggs. I didn’t have white eggs or dye. I hadn’t really prepared well for this. So I improvised.
I took some of the eggs that were about the go bad, emptied them out and David picked some paint colors he liked.

We took turns painting a base coat.

Several of the colors he picked were shiny and translucent so they didn’t paint all that well but he didn’t care. We then made circles with the top of his markers and dots with the back of the paint brush.

So we ended up with these two.

And these two.

All in all, it was quick and fun and we both enjoyed ourselves quite a lot. Next year, I will be more prepared.
This week’s craft was inspired by this (click image for source):
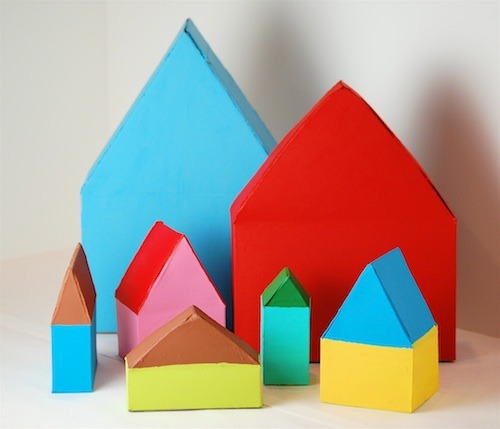
It was considerably harder than it looked and I ended up doing most of the work.

We were good until that point but then scoring it while the top piece was bending was way too hard for me and I just could not get it right. Here’s the finished house.

David then colored it and he likes it naked and unfinished as it is but we might embellish it some more still.
This week’s craft was inspired by this (click image for source):
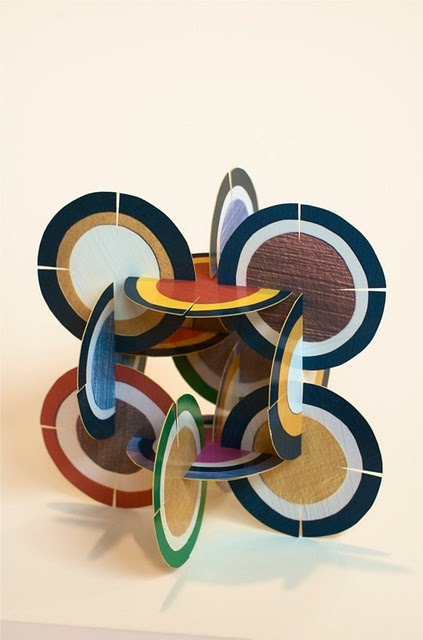
David said he wanted to print on noncolored printer so he could color it and I obliged but then I woke up to this.

He seemed to like them so I didn’t say anything. We picked yellow and green construction paper to glue to the back, punched the circles out.

David put the glue on.

And I stuck them together.

We decided they weren’t strong enough so we glued the construction paper sides to each other and made them all twice as thick.

Which then made it possible for David to build things.

It was really fun and he is enjoying them a lot.
This week’s craft was simple and inspired by this (click image for source):

We didn’t have two shades of green or any red construction paper so we decided to make yellow apples. We also didn’t have any crepe paper so we improvised.

We sprayed the yellow paper with lots of water. Tore pieces and crumpled them up.

David got to use his safety scissors to cut out the tree trunk.

Then we glued the tree together.

We then glued the crumpled up papers to the tree. This turned out to be the best part of the whole thing. Each time we glued a piece down, we had to count to twenty to get the piece to stick so we started at 1 and counted all the way to 260 or so. David did all the counting and it was awesome. We even got to spend a little time talking about the hundredths place.

Here’s our finished tree. I promise it looks nicer now that the glue has dried up. And we used sparkly modge podge so it’s all shiny too.

Another quick but fun craft!
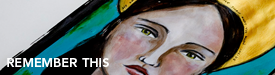
This week’s craft was inspired by this (click image for source):

I am nowhere as talented as Lier so ours did not turn out nearly as awesome but I still love it and so does David.
We grabbed an Amazon box, printed her pdf, cut it all out, traced.

Cutting the cardboard was really quite hard for me. I used box cutters and scissors. I am not talented.

It took me a while to figure out how the whole thing fit together but I did eventually manage it.

And I must admit David loved it.

By the time we were done, I was pretty exhausted and ready to stop so we didn’t do the little pieces and there was no way I was doing the ends like she magically did. I didn’t even get to put the sail in but I think that worked out better actually.

The next morning, I woke up to find David had colored it all with his markers and he’s been playing with it nonstop.
Who can complain about that?
This week’s craft was simple fun inspired by this (click image for source):
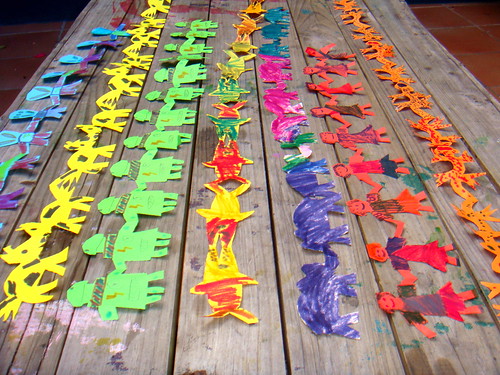
Sadly, I don’t think I made a paper chain since I was a little girl and I wasn’t sure I remembered how. But I tried.

Ahem, I have an art minor from college can you tell? Yeah.
Once we cut them, they were even less recognizable. The first one fell apart and only a few chained.

But the next one was right.

And David enjoyed the process a lot.

Especially when he got to open them for the first time. So he didn’t care that I had no talent.

And remember the truck from last week? They all ended up in the trunk.

All in all, it was quick but really fun! We need to make more of these.
This week’s craft was inspired by this (click photo for source):

We don’t normally have cartons in the house because I don’t like them and we tend to buy a gallon of milk. But as it turned out, we bought some orange juice for Christmas so I saved the carton.
We gathered all of our supplies:

We then taped the edges with glue and construction paper.

We drilled holes in the bottle caps.

I didn’t have the sticks she used, so I cut up a long match we had and thankfully the straws were still wide enough.

David put the straws through.

And we glued them to the truck.

Here are two shots of the finished product.


And here’s David playing with it.

This was a quick and super-fun project. Highly recommended. David loves loves loves his truck.
Since it was David’s birthday last weekend, I thought it would be fun to make him do his own thank-you cards.
We picked three different colored papers form my leftovers stash. Grabbed the Martha Stewart butterfly punch and punched a bunch of hearts out of each. I then cut some heavyweight 8.5×11 paper to create the cards.

I wrote the inside of the cards, thanking them for the specific gift. I kept it short since I knew David would take up a lot of room writing the names.

David then wrote the names of the kids on top.

And his name on the bottom of each card.

When he messed up, we just went with it. Then, we grabbed some stamp and ink:

And we stamped the front of the cards. Some crooked, some less.

He then put glue dots and put one of each color butterfly on the cover. And ruffled up the wings.

And here we are:

Very flawed but 100% authentic. Love them!
Thanks to Lisa, we downloaded some paper airplanes today and we followed her suggestion and made a Delta one and a Classic one.
We printed out the models.

I did most of the folding while David watched. He picked the Delta one and said the Classic can be mine.

here he is with both of them.

Then we raced both of them for a while as we laughed. I taught David how to throw properly (he kept throwing it down and not up so it wouldn’t glide.) and then we realized the little one was watching too and I couldn’t help but get a video of his reaction. It was the highlight of the whole event for both David and me (and Nathaniel I guess!).
Thanks Lisa for the greatest idea!!
This week’s David decided we needed to do a treasure box. I had this old brownie box I’d been keeping so we decided to convert it.
We took a bunch of the excess paper I had from scrappy projects and tore it up to smaller pieces.

We then covered the box with glue and stuck the papers haphazardly so they covered the box. David did all the sticking with a little guidance from me. I then covered the whole thing with another layer of glue and we left it to dry.

We then did the sides and the other piece.

We cut off all the excess paper, glued down the stay bits and the next thing we knew, we had a fully covered box, waiting to hold some treasures. We might embellish it more but it looks pretty perfect as it is.
This week’s craft wasn’t a craft. It was a science project. We decided to do one of the experiments in the science kit I got David for Christmas. It was the exploding volcano.
Here’s David doing it:

And since photos cannot capture this one, here’s a bit of video I shot. It’s one minute and might be boring for you. We’re whispering because Jake was napping. Nathaniel is screaming cause he’s in the high chair and out of puffs.
This was a really fun one for me. I always loved playing with my Chemistry set as a little girl and thanks to David, I got to relive a bit of that. I might have even enjoyed it more than he did.
We kept the jello container from last week to do one of these.

The source link.
We used some red scrap extras to make the roof.

I attempted to draw some windows and doors on another scrappy extra.

David helped me glue them on.

Of course, no project is complete without stickles, so we used them to decorate.

And here’s our final product, left to dry overnight.

It was pretty dark by then which is why we have blurry-ish photos. I love the whole scene in the original post and we’ll have to add to it at some point. But this is a cute start.
|
projects for twenty twenty-four
projects for twenty twenty-three
projects for twenty twenty-two
projects for twenty twenty-one
projects for twenty nineteen
projects for twenty eighteen
projects from twenty seventeen
monthly projects from previous years
some of my previous projects
|